Friday, April 29, 2011

The First Sprouts Appear!

Hurray! We've seen the first signs of life from our tiny seeds!

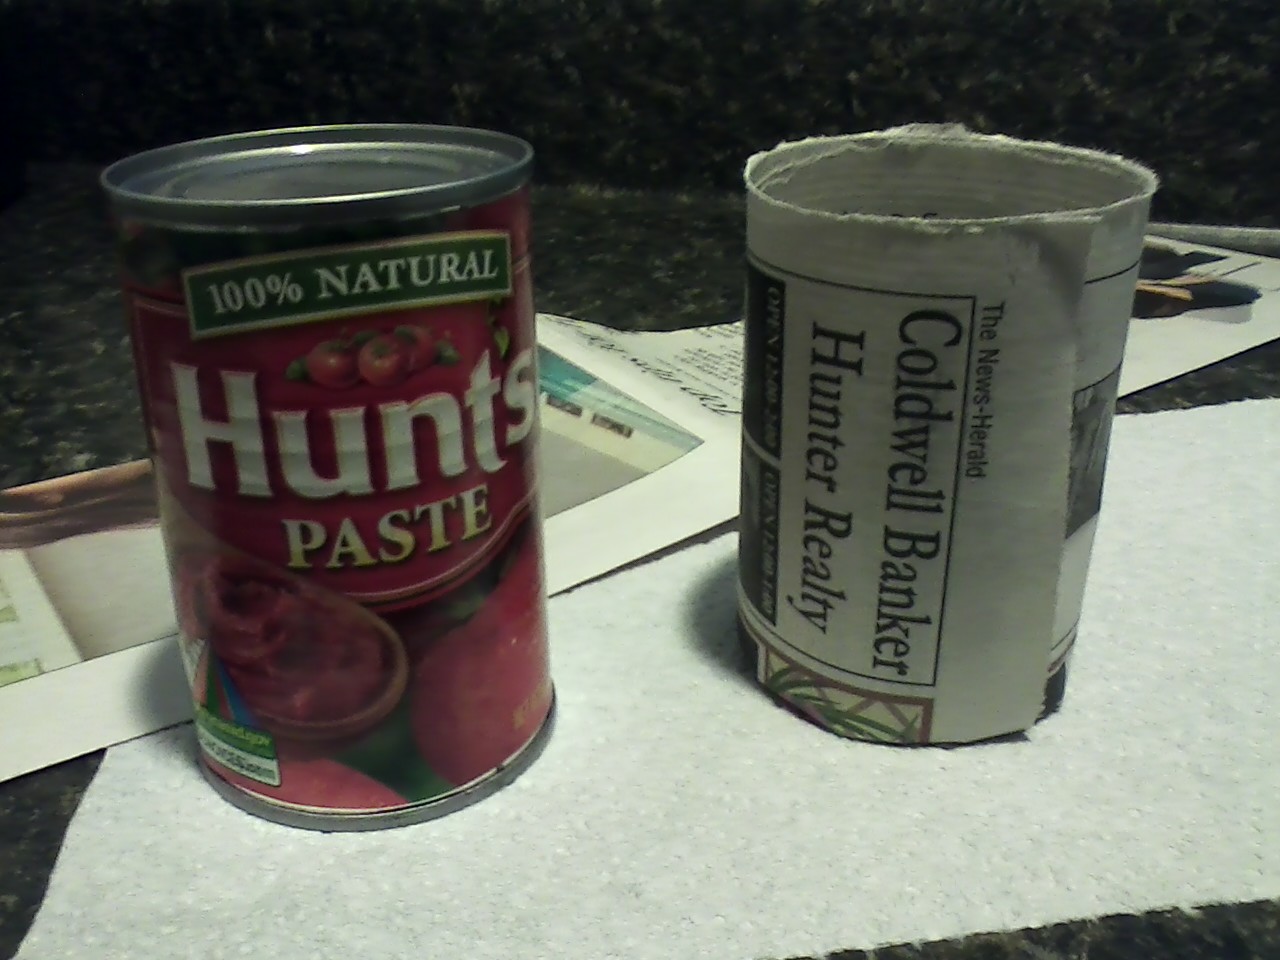
I was getting a little discouraged (because I am not very good at waiting!) since I was expecting at least some of the plants to be growing by now...I thought sure the beans would have been quick to sprout--but our spring weather has been challenging to say the least.  After about 2 weeks of chilly, cloudy, and RAINY weather our seedlings are just starting to pop up through the surface of the soil.  We've experienced a few set backs though, such as extremely strong winds blowing panels off the greenhouse and rain gushing right in on top of the pots, and I am sure that played a roll in the extra few days it has taken.  Having the peat and newspaper seed pots inside the greenhouse has kept them about 15 degrees warmer than the outside temperature on most days, encouraging growth despite the cold.  Oh, and as far as the homemade newspaper pots are concerned...they are holding up very well, perhaps dry out slightly quicker than their peat friends but overall doing their job no differently so far.
peas


Update on seeds planted Tuesday April 12

             peas--beginning to show on Easter Sunday April 24.  I am very happy these are growing, the last time I tried to grow peas they all rotted and never even sprouted--this is looking promising!

cucumbers


  cucumbers--several sprouts peaked out on Mon April 25. We're on our way to dill pickles for sure!


grape tomatoes
grape tomatoes--Tues April 26, all 16 peat cells have 2 or more plants each. These were seeds I saved from grape tomatoes I grew last summer, and the first of the tomatoes to sprout.  My family likes the grape tomatoes better than the cherry tomatoes because they are much sweeter! They are great right off the vine, or in salads, or roasted in the oven.


Surprise! Its raining again today!  But when it lets up a little I will go out and see what else is coming up and let you know. Maybe some squash and peppers?!


Wednesday, April 27, 2011

The Early Edibles


While we are waiting for those seeds to sprout I wanted to show you some of the plants that are already up and growing and ready for use in the kitchen.

Salad Greens--Most varieties of lettuce and spinach are good growers for cool weather, in both early spring or in the fall.  Adding fiber, folate, vitamins A & K to our diets, one of the types that we like very much is Buttercrunch Leaf Lettuce.  Last summer we also tried growing Mesclun Blend and Romaine as well as Baby Spinach.  A problem we had last year was the Cabbage Moth who visited our lettuce patch and laid eggs which turned into little green wormies that nibbled on our leafy goodness. GROSS!  The plan this year is to create a sort of row cover of fine mesh to keep the moths from getting to the lettuce plants in the first place.  That project will be taking place soon. I will let you know how it turns out.


Chives--Started from seed or bought from a garden center, you'll never regret getting a clump of chives of your very own.  You may even find that you have some growing wild in your lawn, evidenced by a light green oniony fragrance when you mow the grass.  A handful of chives fresh from the garden can be chopped and added to any number of dishes to add great flavor. Chives are also very easy to dry and store for use throughout the winter as well.  More pros: chives are a perennials (they come back every year), multiply quickly, and grow in a clump that is easy to divide, transplant, & share.


Wild Garlic--I discovered this about 3 years ago and transplanted a bunch of it into my herb garden.  As shown in the picture, wild garlic has a green shoot that grows into curlie cues toward the top, and can be used just like chives or green onions. The garlic bulb or clove is very small and much harder than regular garlic, and is pretty difficult to peel, but has a nice strong flavor and is worth the time it takes to clean and prepare it.  I harvest the cloves after the shoots have flowered and produced little seeds (thats what will grow into more little cloves next year).  I wash and peel them and store them whole in the freezer.

This year is the first that I am trying to grow regular large garlic.  Most resources say that garlic must be planted in the fall for harvest the following year, however I read one document that says if planted in the cold weather of March or April garlic has a good chance of growing well for harvest in August.  We'll see what happens to the pieces I planted last week.


Some things you may think of as weeds rather than early edible plants are a good addition to your spring salads.


Violets--


I recently learned that these pretty perennials growing wild all around the back yard and flower beds are actually an edible plant.  Violets have dark green glossy leaves which vary from oval to heart-shaped, and have fragrant flowers which bloom in  April.  Both the leaves and the blossoms can be used as garnishes on chilled soups, fruit, or punches, candied for use on cakes and pastries. The leaves are good eaten alone or added to a mix of greens.  I read that the violet has herbal/medicinal uses too, but I'll save that for another post...


Dandelion--Just like everyone else I know, I think this is an annoying weed!  But the truth is that some good can be said of it, and since its going to grow in your yard anyways you might as well find some use for it (unless you live on a golf course or have a landscape company care for your yard--and if you did then you probably would be doing something other than reading this blog!)

Dandelions provide beneficial vitamins A, B, C and D as well as minerals Iron, Potassium and Zinc.  The shiny, deeply toothed leaves are commonly added to salads and sandwiches.  I have read that the roots can be used medicinally and the blossoms can be made into wine.


The greens of both the Violet and the Dandelion are considered "hot, bitter, spicy" type of lettuce, and the great cook I am married to just informed me that type of salad tastes best when served with sweeter dressing with a red wine vinegar or a cider vinegar as its base ingredient.


Well, there you go, some basic info... let me know if any of you are going to go check out your yard for some of these unassuming salad fixin's!


Tuesday, April 26, 2011

Cultivating Soil & Sowing Seeds--Part Two

Ready to Sow the Seeds!  

In the past, I have grow only a few plants from seed and purchased the rest already growing at a garden center or nursery.  However, this year I am starting nearly all of my large vegetable garden from seed.


Selecting the seeds to use was quite a task in itself!  I did save seeds from the things I grew last year.   But I have recently learned that some plants have been altered so as not to produce good seed to save for a productive crop the next planting season or the one after that, and thereby requiring the gardener to purchase new seeds nearly every year and inhibiting the true liberties of gardening to providing food for one's family.  


seed catalog from seedsavers.org
I am now convinced that there can be nothing like good ol' heirloom seeds!   After proving myself a worthy gardener ( just kidding, that's not really the case, I just never asked for them until now)  I have finally been given an envelope of cherished tomato seeds which have been planted, grown, and harvested by some members of my family for decades. They are supposed to produce large meaty sauce tomatoes that my great grandmother acquired from a little old Italian lady, and I am anxious to watch them grow this year for myself.  The rest of my selections were purchased from Seed Savers Exchange  http://seedsavers.org/  which offers a free catalog full of color photos and tons of information on nearly 600 varieties of seeds--vegetable and flower--available for sale to the public.  The seeds are certified USDA organic, and therefore have not been tampered with nor had any chemicals applied to them.  They are available in various sized packages, however I chose only to buy the smallest quantity of the kinds I wanted, which cost $2.75 per packet (fairly close to the going rate for a packet of "questionable" seed at local stores).  The delivery arrived on my doorstep a few days after I place the order.   

 As you can see from the picture at the top of the page, I have a lot of seeds to sow!  Keeping a small notebook of gardening notes is a easy way to organize which varieties I have planted and record things such as the date each was started, problems incurred, tips to remember, and even whether or not we like the final product when it comes time to harvest.   


Some of the seed pots in the greenhouse
Now, because we live in an area that has quite chilly rainy springs (such as this year), I have chosen to start my seeds in peat pots and homemade newspaper pots, filled with my blend of potting soil and peat moss, inside our greenhouse to give our plants a head start in a protected area.  I know in the previous post I wrote about cultivating the soil in the garden in order to make it ready to grow seeds and this still holds true for some of the things I will start directly in the garden such as beans, and some squash that germinate quickly.  The soil cultivation is equally important for receiving the newly sprouted plants when time comes to plant them as well.  


More tips to remember when sowing seeds:
Read the package--different seeds need to be planted at specific depths in the soil for the best germination and growth.  Squash (summer, winter, and pumpkins), beans, cucumbers, watermelons are usually sown beneath an inch or so of loose soil, whereas tomato and pepper seeds are to be only about one half of an inch below the surface, and lettuce, carrots and herbs (having the smallest seeds of all) are even more shallow than that.


Monitor moisture closely--appropriate watering is vital. Consistent moisture is best.  Too much saturation will cause mold and rot the seeds before they have a chance to grow.  If your seed pots are drying out too quickly, or you are not available for more frequent light waterings, a covering of kitchen plastic cling wrap may be laid directly over the seed pots to hold moisture and some warmth into the soil. The plastic wrap should be removed once the little sprouts appear.


Warmth--some seeds like peas and salad greens sprout early with cool temperatures, so you can expect to see them popping up from the pots first, followed by beans and other vegetable varieties once the temperature warms a little more.  Soil temperatures have to be quite a lot warmer for tomatoes, peppers and herbs to being to sprout and you will generally be waiting the longest to see any signs of them growing.


Quantity--I hold to the idea that you must sow more than you think you will want or need, because inevitably some of those seeds are just not going to come up, and if they do they might not transplant well. Or they could all grow into healthy young plants and you will have an abundance to share with your family and friends. You never can tell ahead of time, but still you sow and care for those seeds just the same!  


That makes me think of a verse in the Bible--"In the morning sow thy seed, and in the evening withhold not thine hand: for thou knowest not whether shall prosper, either this or that, or whether they both shall be alike good." Ecclesiastes 11:6    Not only should we have our hearts cultivated to receive the Seed of the Word of God and produce Fruit of the Spirit in our lives,  but we are supposed to go out and sow "seeds" unto others as well.  We must continually spread the message of God's Word, through planting seed varieties such as faith, love, generosity, and encouragement in others. We can't foresee whether our efforts will be fruitful, but trusting the promise in Galatians 6:9 "And let us not be weary in well doing: for in due season we shall reap, if we faint not" we labor on because even though many of the seeds we sow will not grow at all, some will take root and grow to maturity. And these seeds will give a bountiful harvest the size of which we can't even comprehend.

 "But this I say, He which soweth sparingly shall reap also sparingly; and he which soweth bountifully shall reap also bountifully"  2 Corinthians 9:6


Note: The seeds were planted in the greenhouse on Tues April 12.  An update will follow as soon as there are any signs of growth...


Cultivating Soil & Sowing Seeds--Part One


I have been spending too much time thinking over what to write about next. Lots of ideas floating around my head on the topics in the title of this post, but every time I started to write I ended up thinking "no one is gonna want to read this farmer's almanac or mini sermon either." And so I would delete it all and turn the computer off.  After a busy weekend, some minor disturbances (the basement flooded, the car died, etc) and a lovely Easter, I am determined now to get a few ideas typed out here....


As most of you know, or by now can guess, I am really interested in gardening--flower beds, other plants and shrubs, and especially my veggies! Something I take more seriously than my outdoor actual gardening, is my "Christian Gardening". (yes, I just made up that term)  The Bible says, "whatsoever ye do, do it heartily, as to the Lord" and gives plenty of gardening related lessons as well, so why not put that all together with something I enjoy besides! Makes sense to me!  So, you are getting some of both!

The first thing that must be done before anything can be planted, is cultivating the soil: get it ready to receive the seed, break up the hard ground, let in the light and water, and remove the weeds.

You can see in this picture the rototiller my dad and Bryan picked up last year at a yard sale--it's an oldie but goodie, strong, runs good, barely used (the paint was still on the tines) and had a great price besides! The rototiller is extremely useful for making a new planting area where once there was none; it can really dig in there and get the hardened soil broken up, weeds up rooted, and applications mixed in.
"Burial Mounds"  Raised Planting Beds
  For existing garden beds, machine tilling is not always necessary and can often times do more harm than good.  For example, instead of long narrow rows all parallel in a field, I prefer to have raised planting areas (which my family teasingly call my "burial mounds") creating deeper looser soil therefore allowing roots to grow deeper and more easily. Aggressive tilling here would not only make a mess of my fairly symmetrical and organized garden, but would ruin the soil structure, as amendments have been carefully added only to the planting areas leaving narrow trodden down paths for walking, and earthworm activity would be disturbed (once we get them in there we want them to be happy and keep doing good things for our dirt!)

Another handy tool: the garden rake
 To keep these existing raised beds tidy around the edges and the surface loosened for water absorption, warmth of the sun and weed removal, I like to use a rigid garden rake. Standing on one side of the row, I work my way along drawing up any fallen soil from the pathway on the opposite side of the mound.


Matthew 13:1-23 in the Bible gives account of the parable of the sower which Jesus used to teach the crowd that had gathered and His disciples as well.  The lesson teaches of the Sower (Jesus) scattering seed (which is the Word of God) on much varying areas of soil (illustrating our hearts and responses to God's Word) and the resulting harvest.

Let us be sure that the soil in the garden of our hearts is not hard and callused; Or full of the rocks that surface and keep us from being deeply rooted in the Word of God; Or full of weeds, other things that grow in the way and choke out our fruitfulness.  Lord, I pray that I would be a good gardener, cultivating my heart into good ground to receive Your Word, and each day grow more Fruit of the Spirit in abundant harvest.
"But he that received seed into the good ground is he that heareth the word, and understandeth it; which also beareth fruit, and bringeth forth, some an hundredfold, some sixty, some thirty."     Matthew 13:23


Coming soon:
Cultivating Soil & Sowing Seeds--Part Two
"But this I say, He which soweth sparingly shall reap also sparingly; and he which soweth bountifully shall reap also bountifully"  2 Corinthians 9:6


Tuesday, April 19, 2011

The Essentials

Let's start at the very beginning-- its a very good place to start!

While waiting for a break in this rain and chilly weather, so I can get back outside, I guess its as good a time as any to share some of the things I consider to be treasured gardening accessories and the very basic tools to help the beginner gardener be successful.


Watering Can--I prefer this 2 gallon galvanized metal watering can, which has two handles for stability, and a fine gauge upward rose on the nozzle for a gentle more "rain-like" water flow. It is useful for watering all potted plants, and new transplants.

Spray Bottle--cheap dollar store variety is good enough for misting certain plants in the greenhouse that don't require a whole lot of water, for cleaning dust off of house plant leaves, and for keeping the peat and/or newspaper seed pots moist until the seeds sprout.

Soil Tester--picked up last summer at Lowe's Garden Center. It takes readings on the acidity and moisture of the soil, as well as the amount of light in a certain area.  Particularly, this little device gives a good idea if you are watering your plants deeply enough, by reading the moisture through a probe that sticks into the soil down by the roots.  Thorough and less often watering for most types of plants is beneficial for good root structure, more so than frequent shallow, light waterings.

3-prong Cultivator & Trowel--a virtual extension of my hands for most of the summer months! After years of using and wearing out the cheap versions of these tools, I finally broke down and bought this matching set last spring as a birthday gift to myself with a gift card and coupon.  These True Temper brand tools are extremely durable, and have really comfortable handles which I've discovered is super important when using them as much as I do!  The Cultivator's 3 prongs are formed from one piece of forged steel, rather than the center prong being welded on creating a joint that becomes weak and gives way fairly quickly. It's purpose is for scratching up weeds, and keeping the soil loose and aerated. The Trowel of course does the transplanting, and weeding, and mashing the occasional spider or other undesirable creepy crawly that I encounter out there!

Pruners--Fiskers brand are the best and this pair is going on year 6, out living many of its cheaper colleagues. My medium sized clippers are so useful from trimming rose buses, to pruning suckers off the tomato plants, to cutting twine, and last but not least chopping the Giant Tomato Worms in half.  (Hopefully we won't have any infestations this year so I won't have to tell you more about those creatures, but if you are interested visit the post that JonOfAllTrades put up last summer concerning the little beasts we found on our tomato crops. http://jonofalltrades.blogspot.com/2010/08/garden-update-sunday-8810.html They are really gross, but kind of cool too, in a gross sort of way!)

Gloves--I wear out several pair in a summer--usually one gets trashed just from installing mulch in the flowerbeds, one for all the other planting and tending, and then another for fall cleanup. Thinner gloves with a rubber or vinyl palm and fingers are my favorite because they allow for better dexterity, but also better protection for my nails (Yah, that's right, nails, farmers can still have nice nails can't they?) I usually try to purchase a bunch if I find them at Family Dollar or Dollar General for around $2 as they can be as much as $6 at Garden Centers or even Walmart.

Boots--To be honest this is my first pair of "garden boots", thanks to my mommy who picked them up for my birthday. You see, usually I end up slipping on my Crocs and tromping out to the garden, and then I end up with very grungy feet! Such a HILLBILLY!  Being that we are adding cow manure to the garden this year I guess its a good idea to wear the "disco manure boots" as my husband nicknamed them!  They should look great with the overalls and straw hat!? (not so sure you will get to see a picture of my garden outfit, its pretty "farmer-ish" but maybe...we'll see how daring I am feeling later in the season.)


Stay tuned... I will let you know more as soon as I can put these basic tools to work!


Monday, April 18, 2011

Newspaper seed pots

Hello everyone. Thought I'd give this posting a try on my own tonight, and as suggested by JonOfAllTrades, I will show you how I made some seed starting pots out of newspaper.  
In almost every store, including the dollar stores now, "peat pots" are available for sale to be used for starting seeds.

The benefit of this type of pot is that it is biodegradable and therefore is planted right into the garden along with the seedling, allowing for less disturbance to the fragile, newly rooted plant. Prices vary a bit depending on brand name and whether they are ice cube tray style or individual pots.  Most places are between $3 and $5 for a 4 tray pack of 8 medium sized cells per tray.  In years past, it was no big deal to pick up a few packs for getting an early start on some beans or other seeds, however when starting seeds for nearly everything we intend to grow this year, that added up rather quickly. Now I have to say that yes we did have to spend some of the gardening supply budget on peat pots, but I also recently found a way to make some and use up the Sunday newspaper! Two weeks' Sunday papers (NewsHerald $1.50 and the Plain Dealer $2.00) total cost: $3.50-----total seed pots produced: 200! 
Here's what to do:  Take a full-sized sheet of newspaper as pictured above, and cut or tear it in half along the fold. Then cut each half into thirds vertically, resulting in strips of newspaper approximately 4 inches wide.  Next, roll the strip of paper around a container of some sort. I found using a small tomato paste can worked perfectly.  Roll the paper so that it is overlapping one end of the can as shown in this picture, keeping the paper fairly snug but not too tight or you will have a hard time pulling it off of the can without tearing it.  Once the paper is rolled around the can fold the overlapped end over, creasing it firmly and forming the bottom of your seed pot. Lastly, gently remove the can from the paper pot.
And there you have a nice little container to fill with soil and begin to grow your own seedlings. Placing the pots on a tray of some kind will help when transporting them, in keeping them snuggled together so as not to tip over, as well as helping to keep them moist after watering. The newspaper will disintegrate just fine once you plant it in the garden, and allow for great transition for the tender roots.

 
Oh, I almost forgot, a note about the soil.  A lot of people swear by the "seed starting" soil mixes, I however do not like it for the following reasons: 1- it contains mostly peat moss, which is very light & fluffy, and floats right out of the pots when you attempt to water them and causes your dry little seeds to flow over board out of the pots, never to be seen again!  2- peat moss does have benefits, however it doesn't have a lot of nutrients for a newly sprouting plant to grow up healthy and strong! Nobody likes wimpy plants! Wimpy plants don't produce as much fruit!     
My Seed Starting Soil Solution----I bought bagged "potting soil" with fertilizer; brought it home and dumped it in the wheel barrow, and mixed a bunch of peat moss into it. (Yes, peat moss, I did say it has its benefits such as keep the soil loose allowing a seed to get its sprout started and push up through the surface to the sun!---dramatic much!?)   I didn't pay close attention to the ratio at the time, but thinking back I would have to say probably 4:1 potting soil to peat.  Mix very well, pour into the cups, bake at 350degrees,  OOPS! wrong recipe!! No Baking Please....but that makes me think, its time for a cup of tea and a little sweet morsel.  Talk to ya again soon!


Saturday, April 16, 2011

My first post !!

Welcome to Getaway Garden! My wonderful brother over at Jon-Of-All-Trades helped me get this up and running so that I can post all about our gardening/canning/storing etc fun !!!

Stayed tuned and bear with me as I am new to all this posting business!

More to come soon as the warm weather is now upon us!